Basic Teaching Techniques for Moving Images
The eight basic
techniques described on these pages are designed to
help you unravel the codes and conventions of the
moving image, and enable you to use a wider range
of film and video texts in the classroom. As you
and your pupils unpack the layers of meaning, you
will be helping them to develop their general
skills as more critical, attentive and
knowledgeable readers of the moving image.
Learning Objective
Pupils should
learn that:
• Every element of a visual image can carry meaning.
• Visual images can be ‘read’ like other texts
• The position of elements within the image, the colours used, and the lighting, can all affect interpretation.
• Camera distance (eg close-up, long shot etc), camera angle and camera movement all affect meaning.
• The number and order of shots affect meaning.
Key Questions
• Why is
the shot composed like this? What
difference would it make if it were
composed differently?
• Why is the camera positioned in this way? What difference would it make if it were somewhere else?
• What difference does it make if the order of shots
is different or some are missing?
• Why is the camera positioned in this way? What difference would it make if it were somewhere else?
• What difference does it make if the order of shots
is different or some are missing?
Freeze Frame
• Use the video pause button to help the class discuss each shot of a short moving image text or extract (eg 60 seconds long) by looking at and discussing:• What they can see in the ‘frozen’ image; how the elements of the image are positioned in the frame; how lighting and colour affect what is seen. Distance between camera and subjects; camera angle; movement of the camera during a shot.
• How many shots there are and how the sequence of shots builds up information and ideas or impressions.
• Possible follow-up:
Use a storyboard or moving image software to change the order of the sequence or eliminate some shots.
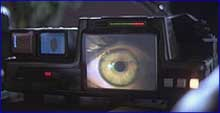
Image: Blade
Runner, 1982 Text Source: Moving Images in the
Classroom. Bfi British Film Institute
© 2006 Sigrid Jones
Contact Me